Course Planner Module
The Course Planner Module consists of the following Sub-modules: Some of the Sub-modules have several functionalities as illustrated below
Course Schedule
1.1 Course Pattern
1.2 Course Unit Schedule
1.3 Session Calendar
1.4 Graduation Schedule
Loadings
2.1 Course Pattern
2.2 Course Unit Schedule
2.3 Session Calendar
Time Tabling
3.1 Course Pattern
3.2 Course Unit Schedule
3.3 Session Calendar
Attendance
5. Reports
Course Pattern
Here, you are able to select and set the Session Year set the term-dates
set registration deadline attendance mode and attach units
-
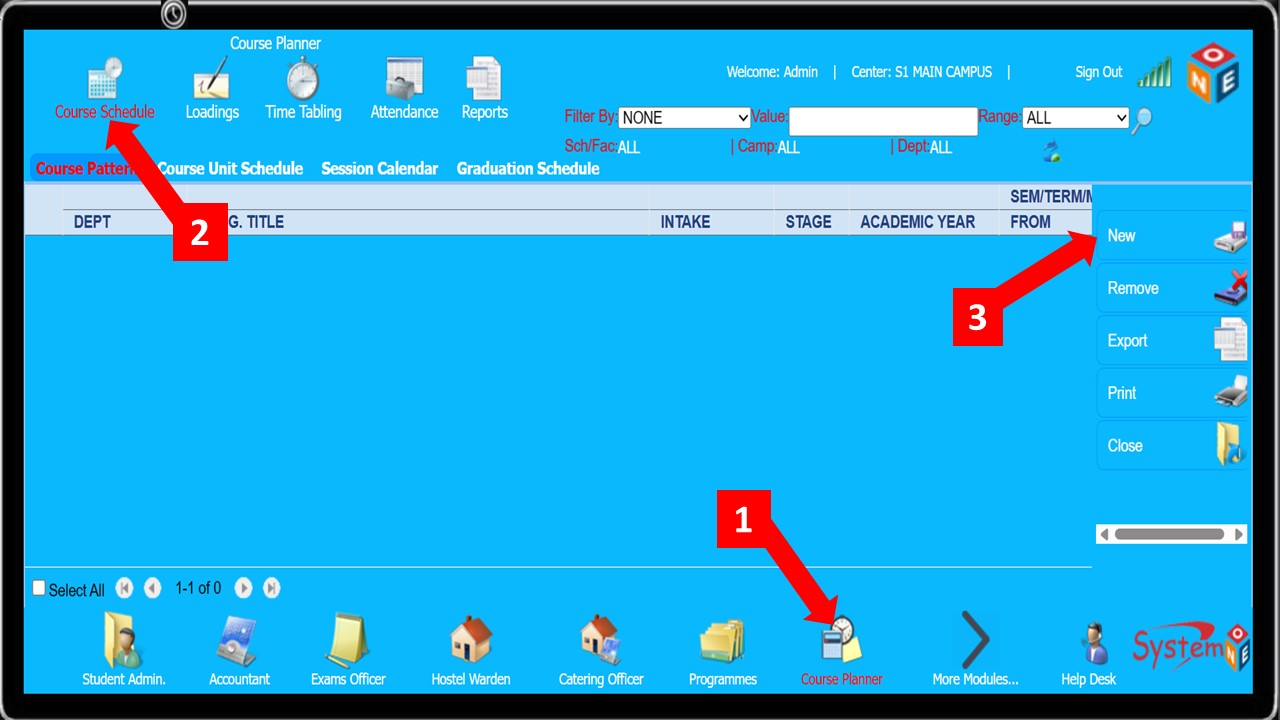
Follow
Step 1toStep 3as shown below to maneuver toCourse Pattern Info page
-
Specify the
Filter Bycriteria, enter the relevant searchValueand click on the magnifying lens as shown inStep 4below to search for the Programme -
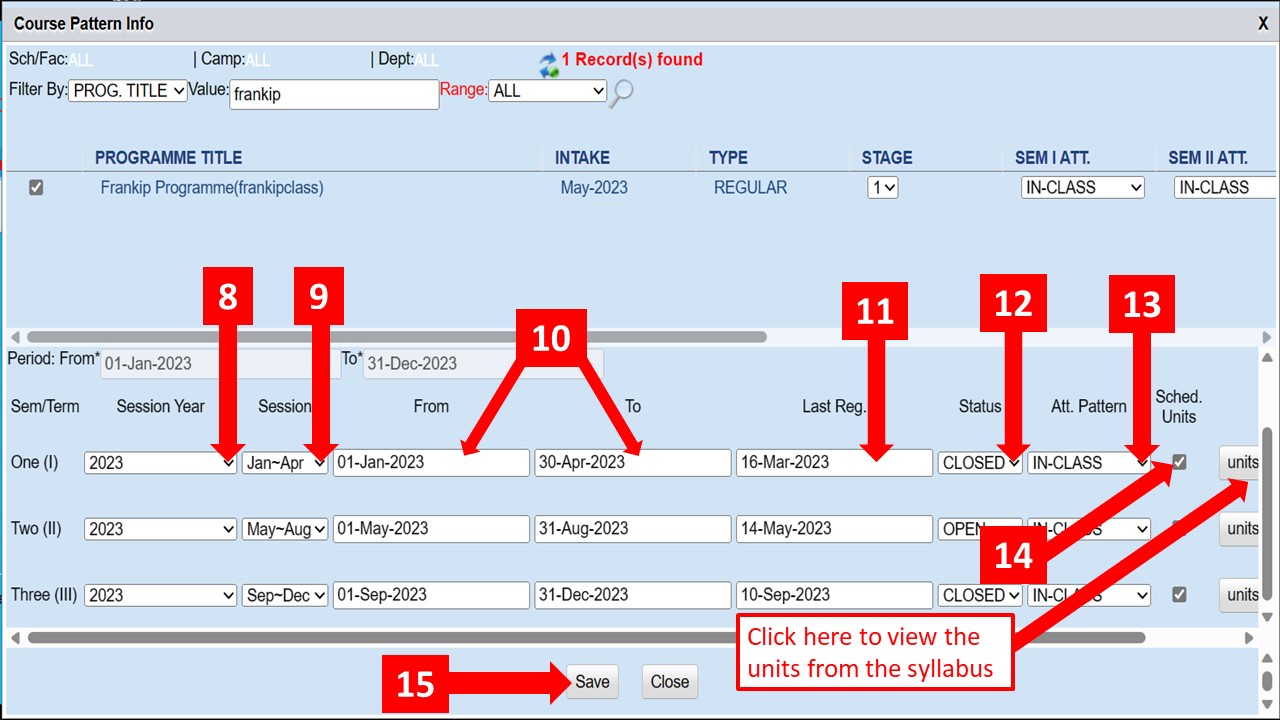
Fill in the correct information for the rest of the fields shown below, from
Step 6toStep 13

-
Repeat
Steps (8-14)for term(s) two(II) and three(III) -
Check the
Sched. Unitsbox(Step 14)to auto-schedule units from the syllabus
Course Unit schedule
This enables you to manually schedule/attach Course Units
-
Follow
Step 1toStep 4as shown below to maneuver to theCourse Schedulingpage

-
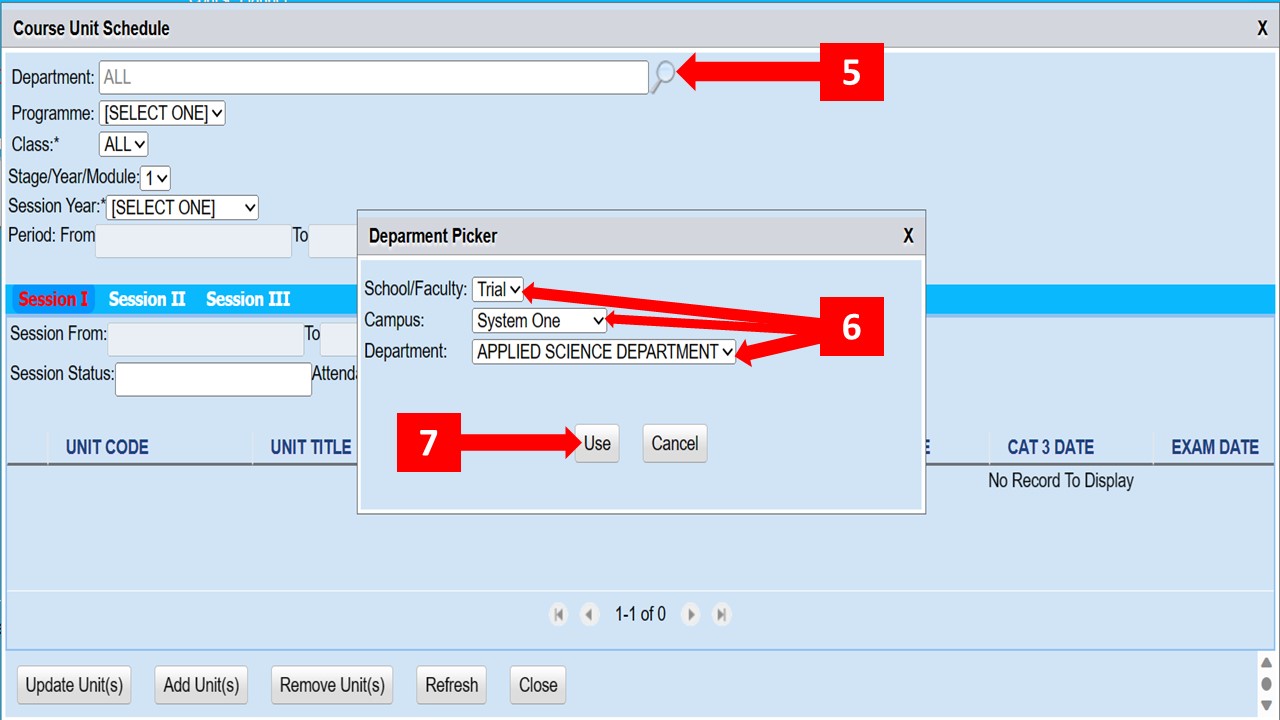
To select a department, click the magnifying lens as shown in
Step 5 -
A Department Picker dialog box appears, select the School/Faculty, Campus, and Department to be used (as shown in
Step 6below) -
Click the Use button as shown in
Step 7below
-
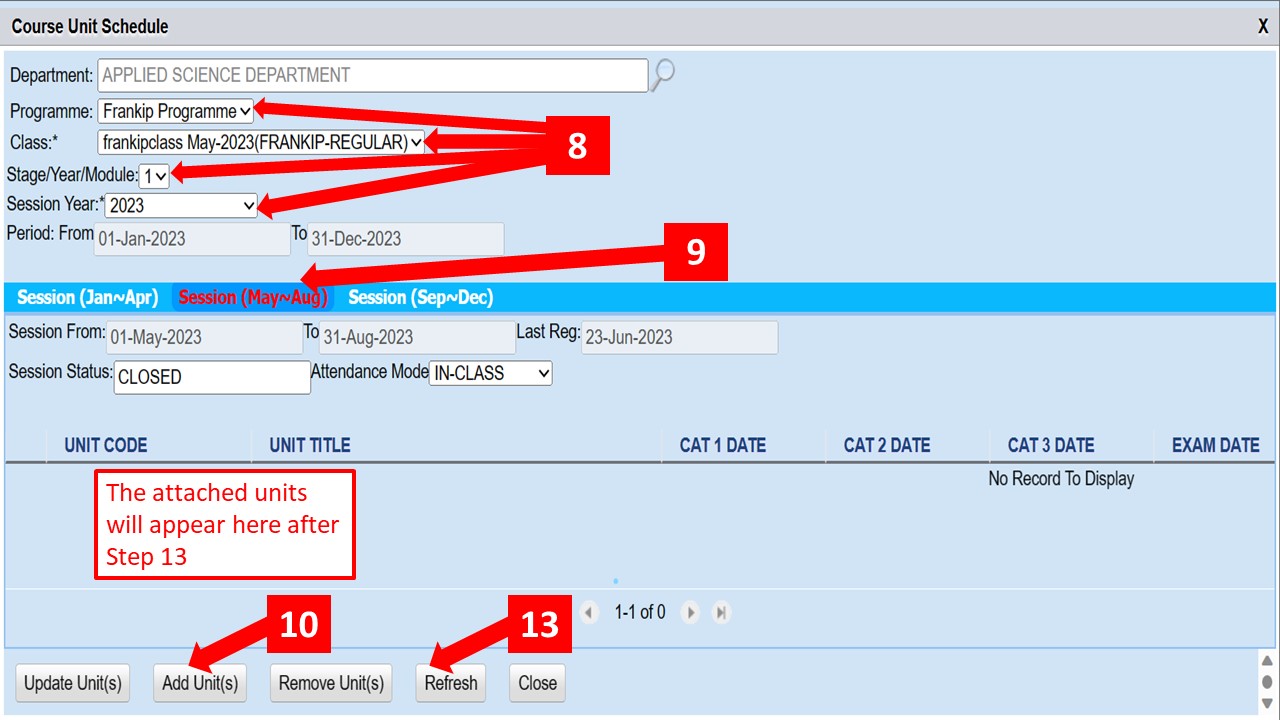
The selected Department is now active and you can select the values for the remaining fields (
Step 8) -
Select the right session from the three options to attach the unit(s) to as shown in
Step 9 -
Click the Add Unit(s) button
Step 10
-
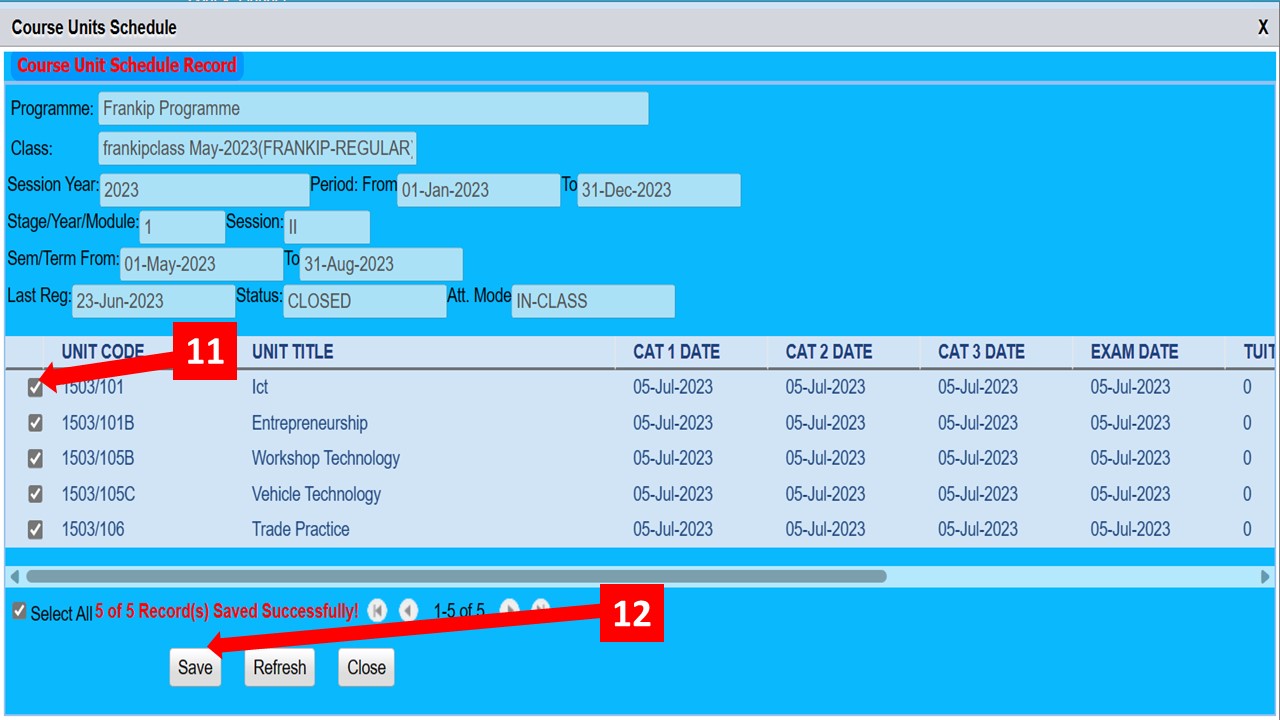
A window pops up with a pool of units to choose from. Select the relevant units (
Step 11) and click the save button (Step 12) -
Close the current window and click the refresh button (
Step 13) on the resulting window - The attached units should now appear
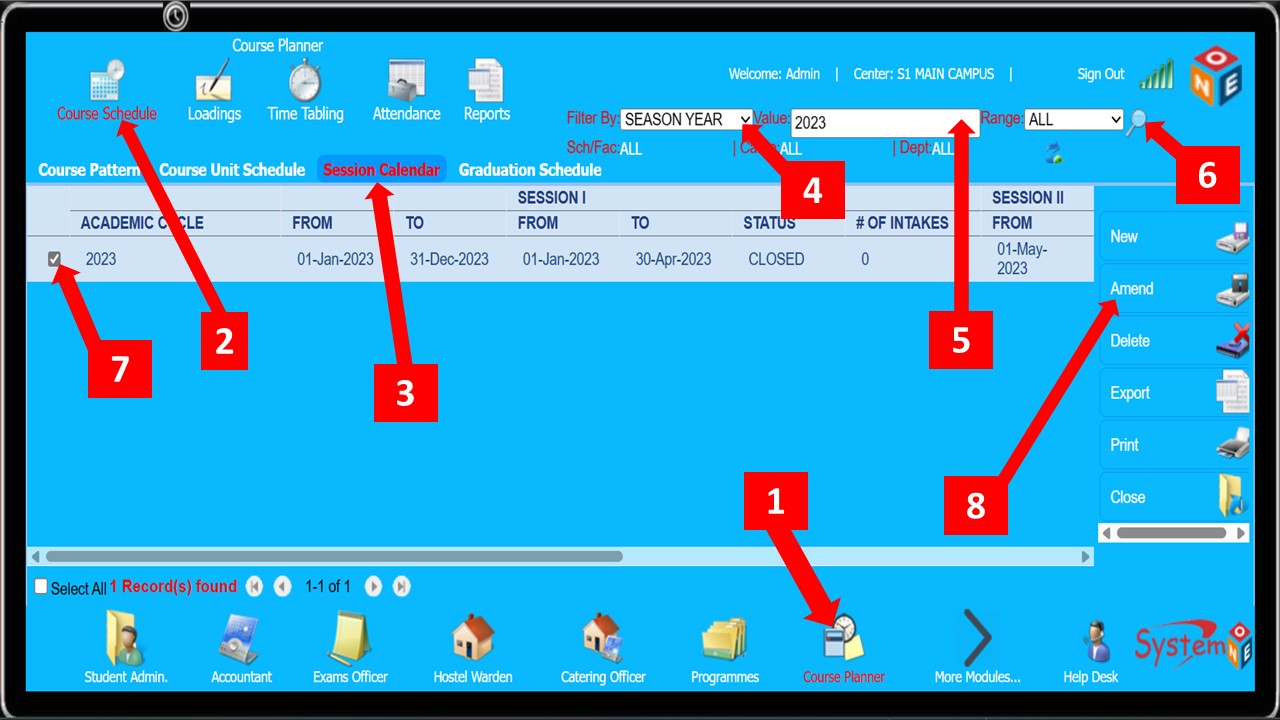
Session Calendar
Session Calendar enables you to set term-dates if it was not done inCourse Pattern or amend the dates that had already been set
You're also able to set/amend registration deadline from here if the same had not been set in Course Pattern
-
Follow the steps shown below to set/amend the
Academic Cycle
-
Select the correct details as shown in the window below and click the
Savebutton

Graduation Schedule
Graduation Schedule helps you to...
Comming Soon
Course Unit(s) Allocation
Course Unit(s) Allocation helps you to...
Comming Soon
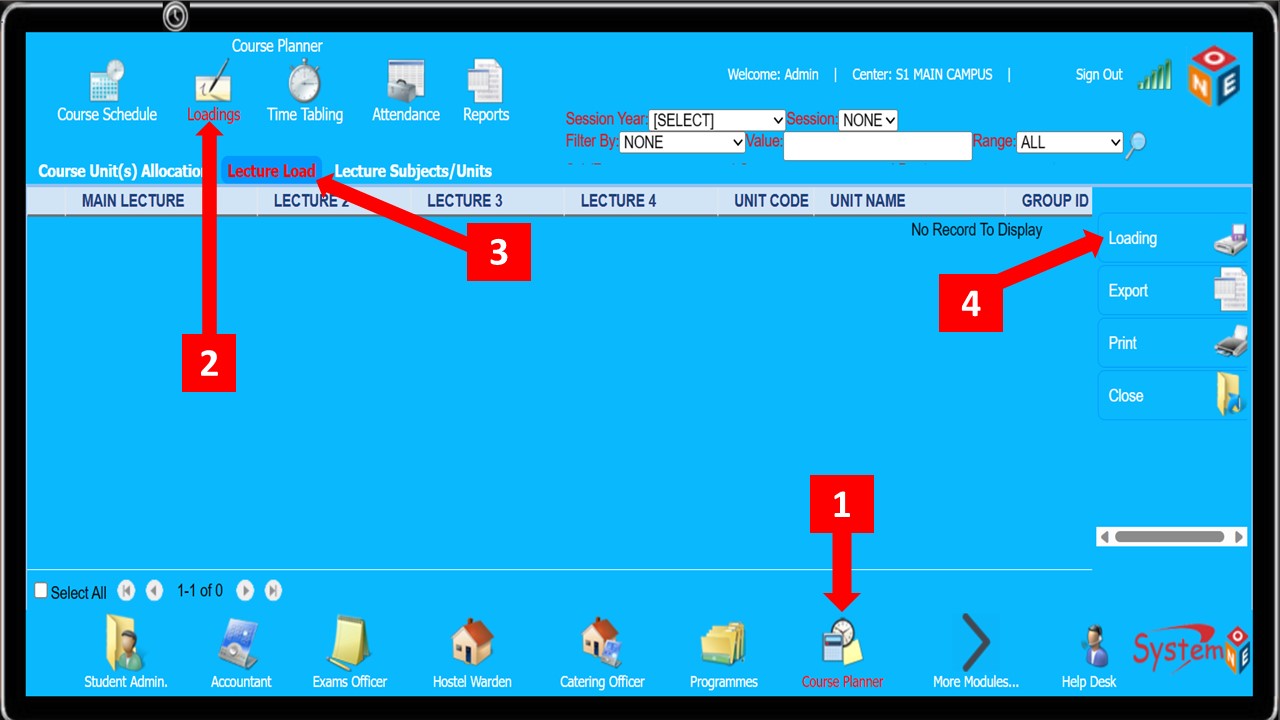
Lecture Load
This is where you assign units to a lecturer(s)
- The steps shown below are to be followed in the process of assigning units to the lecturer(s)
-
Follow
Step 1toStep 4to open theCourse Unit Loadpage
-
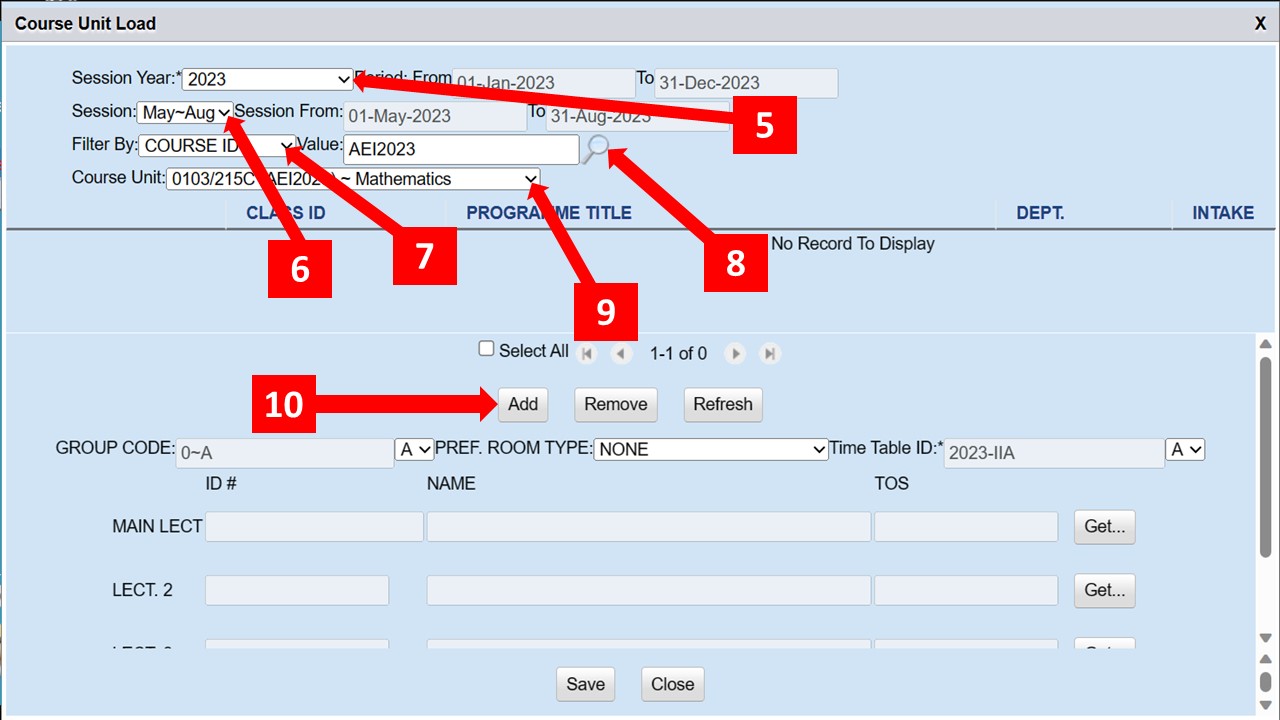
Set all the parameters as shown from
Step 5toStep 9 -
Once you find the relevant unit, click add (
Step 10) to proceed toClass Schedule Look Up
-
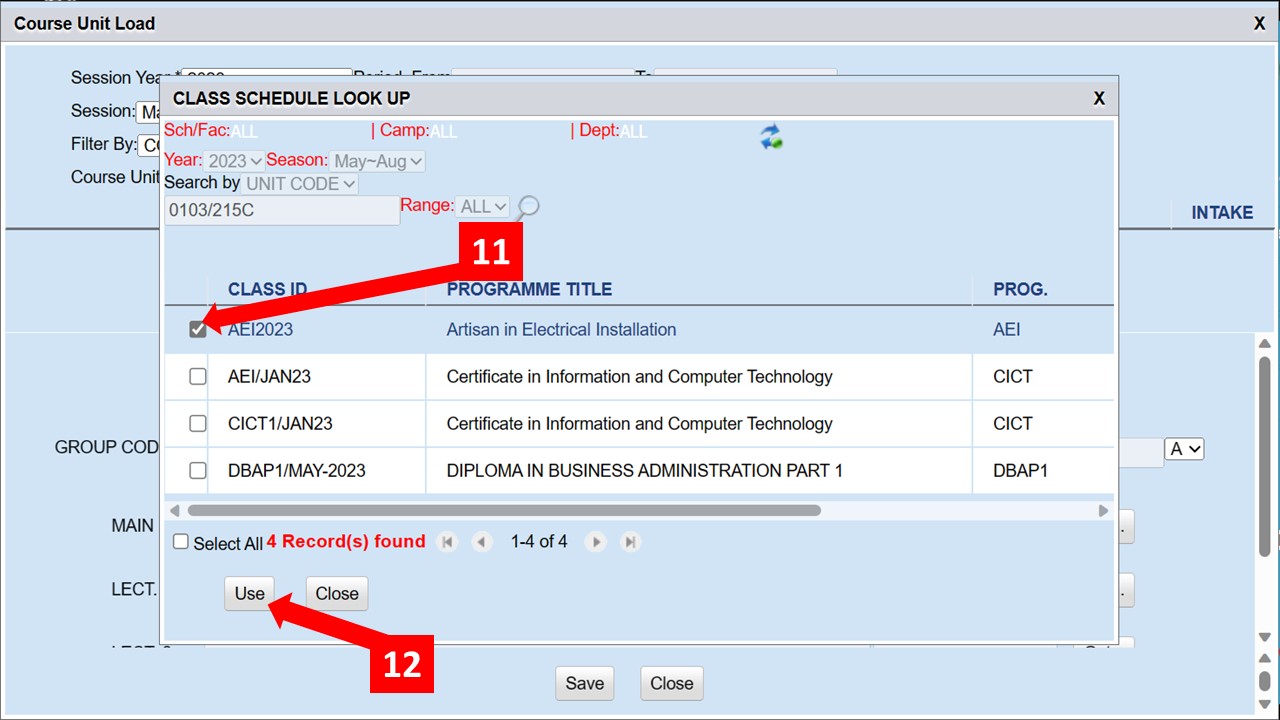
On the
Class Schedule Look Upselect the programme (Step 11), click theUsebutton (Step 12) and close that window
-
On the (
Course Unit Load) window, select the programme again (Step 13) and click thegetbutton (Step 14) which leads you to a (Lecturer Look Up) window

-
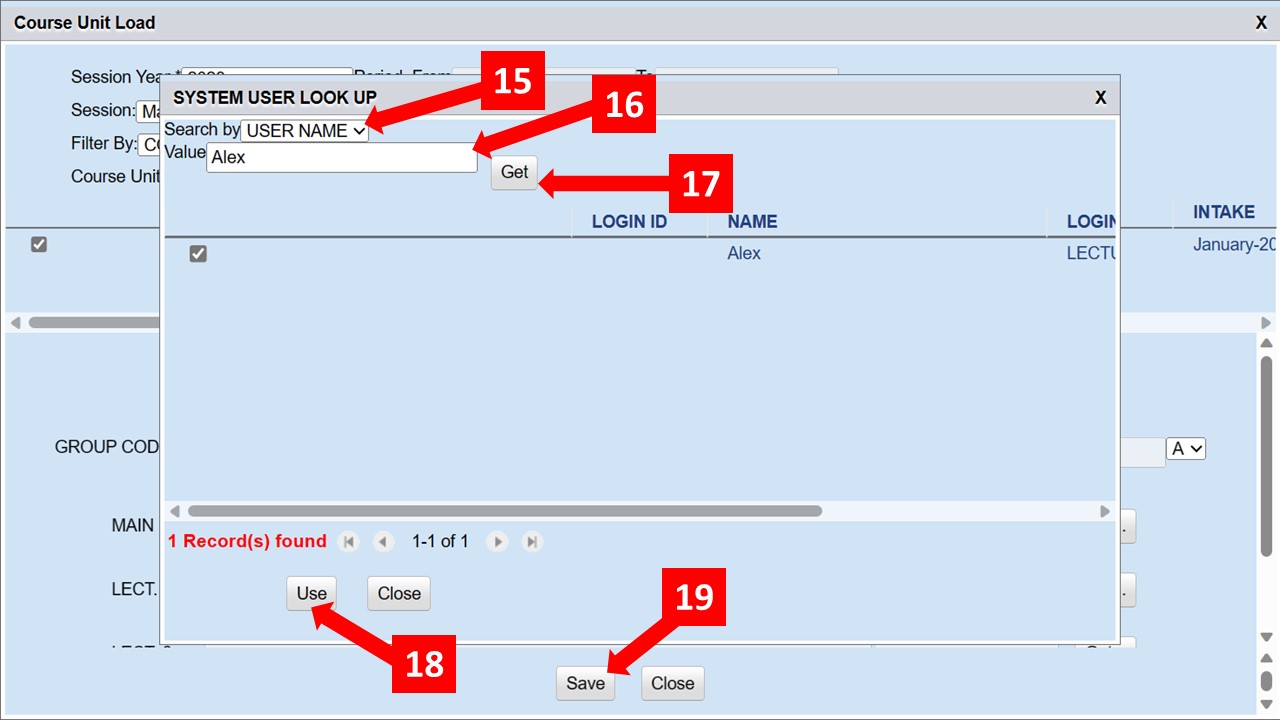
On the
Lecturer Look Upwindow, specify theFilter byparameter (Step 15) and enter theValue(Step 16) -
Click the
Getbutton and the specified lecturer should now appear -
Select the lecturer and click the
UsebuttonStep 18 -
After
step 18, close that window and hit save on the resulting window (step 19) - If the steps have been followed correctly, the lecturer(s) should now be able to see the units allocated to them from their account
Lecture Subjects/Units
Lecture Subjects/Units helps you to...
Comming Soon
Time Tabling
Time Tabling helps you to...
Comming Soon
Exams Time Tabling
Exams Time Tabling helps you to...
Comming Soon
Time Tabling Settings
Time Tabling Settings helps you to...
Comming Soon
Attendance
Attendance helps you to...
Comming Soon
Reports
Follow the steps below to generate reports from the Campus Cura interface
-
Follow
Step 1andStep 2as shown below to maneuver toReports -
Click on the drop-down in
Step 3to select your campus -
Click on the magnifying lens in
Step 4to display all the available results -
Select the relevant report as shown in
Step 5and click theGeneratebutton as shown inStep 6

-
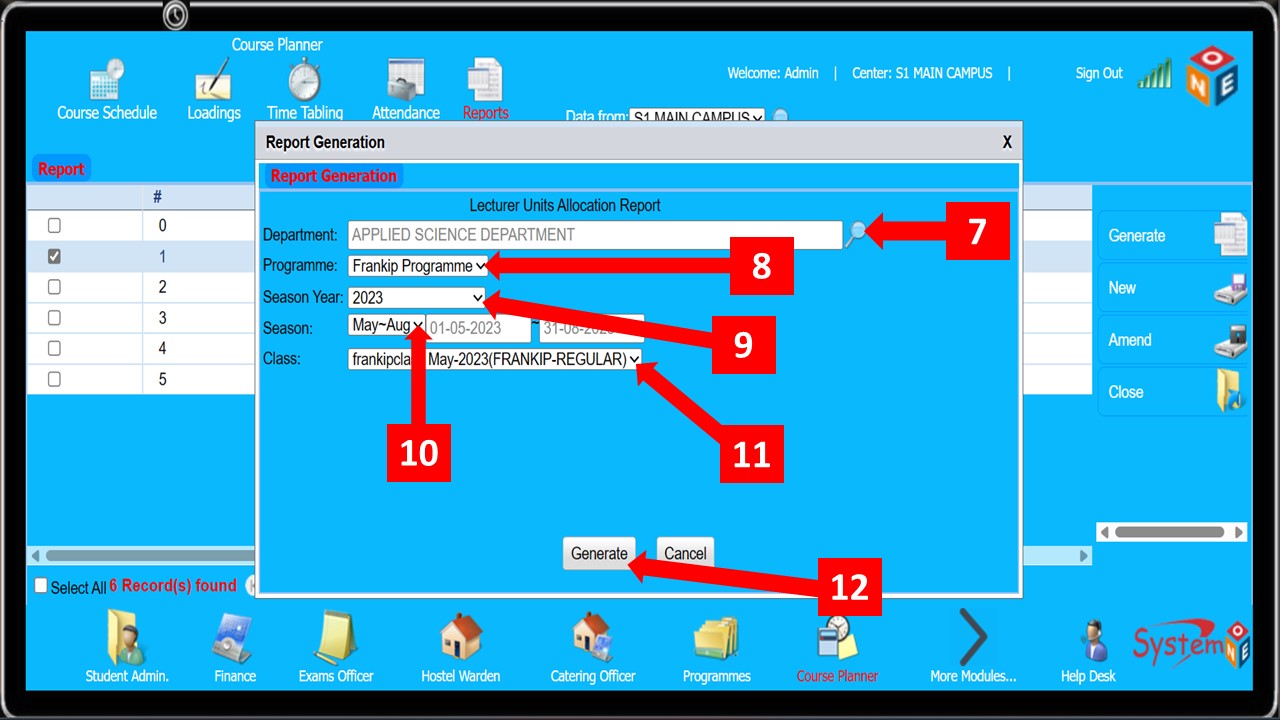
Click the magnifying lens shown in
Step 7, a Department picker dialogue box pops up. Select the relevant School/Faculty, campus, and Department then click theUsebutton at the edge of the box -
Select the relevant information for the fields in
Step 8toStep 11 -
Click generate (
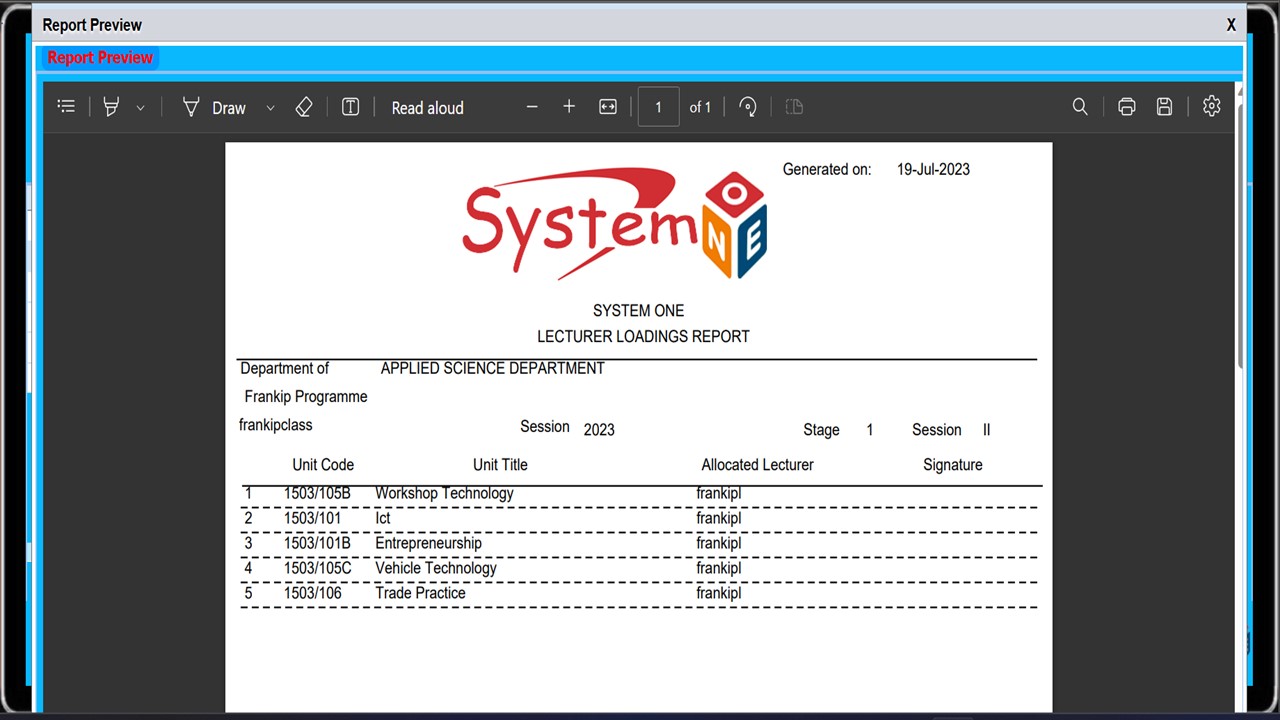
Step 12) and a report preview should pop up as shown below
- The figure below is the preview of a report generated from Campus Cura based on the steps explained above